

Cricut Design Space 3d Paper Flowers
Are you trying to learn everything about Cricut Design Space and you don't even know where to start?
Learning a new hobby or skill can be intimidating at first. I get it; sometimes we don't even know where to start because there's so much information out there and it's just overwhelming.
For me, the best way to learn and master Cricut Design Space is from the beginning!
You see, when you have a clear concept of what every icon and panel is for, then you can truly dig in and start exploring further and further.
Sometimes we are quick to jump from project to project – Hey That's ok too! BTDT – But I think that knowing your work area will help you to take your creativity to a whole new level.
The purpose of this article is to teach you and show you an overview of every Icon, and Panel of the Cricut Design Space Canvas Area.
As time goes, I will be creating more complex tutorials for EVERY single icon and, or function. So if you want to learn more about an icon or skill, I encourage you to click the available links.
Before we dig in, let's learn what the Cricut Design Space Canvas Area is.
The Cricut Design Space Canvas Area is where all of the magic happens before you cut your projects.
Design Space is where you touch up and organize your creations. In this space, not only you can use and upload your fonts and images, but you can also use Cricut's premium images and fonts via individual purchases, Cricut Access, and Cartridges.
Now, That we got that definition out of the way, let's get started!
Note: If you are still learning what a Cricut is and which one you should get; I highly recommend you to read this post where I walk you through 50+ questions before and after I got the Cricut. FYI I spent multiple hours of research and a whole week to put together this ultimate guide.
Cricut Design Space Canvas Tutorial For Beginners – What's everything for?
Investing in a Cricut is futile if you don't learn how to master Design Space because you will always need this software to cut any project.
In my opinion, Cricut Design Space is an excellent tool for beginners, and if you have no experience with any other Design programs like Photoshop or Illustrator, you will find that although it looks overwhelming, it's quite easy.
You guys, if I can do it, you can too!
On the other hand, if you have preview experience with any of the Adobe Creative Cloud apps or Inkscape. You will see that this program is just a breeze. Design Space, it's mainly to touch up your projects and create minimal designs with Shapes and Fonts.
If you want something more sophisticated, you are going to need your own designs or Cricut Access. That's a membership where you get access to their supergiant library. Learn more about it in this article and guide I put together.
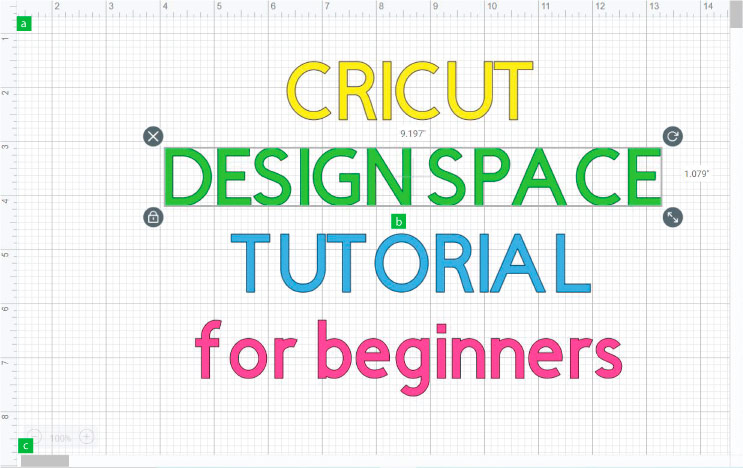
When you log into your Cricut Design Space account and want to start or edit a new project, you will do everything from a window called CANVAS
The Canvas Area in Cricut Design Space is where you do all of your editings before you cut your projects.
I get it!
There are so many buttons, options, and things to do that you might feel lost. Don't worry, I am here along the way, cheering you up and encouraging you to keep going.
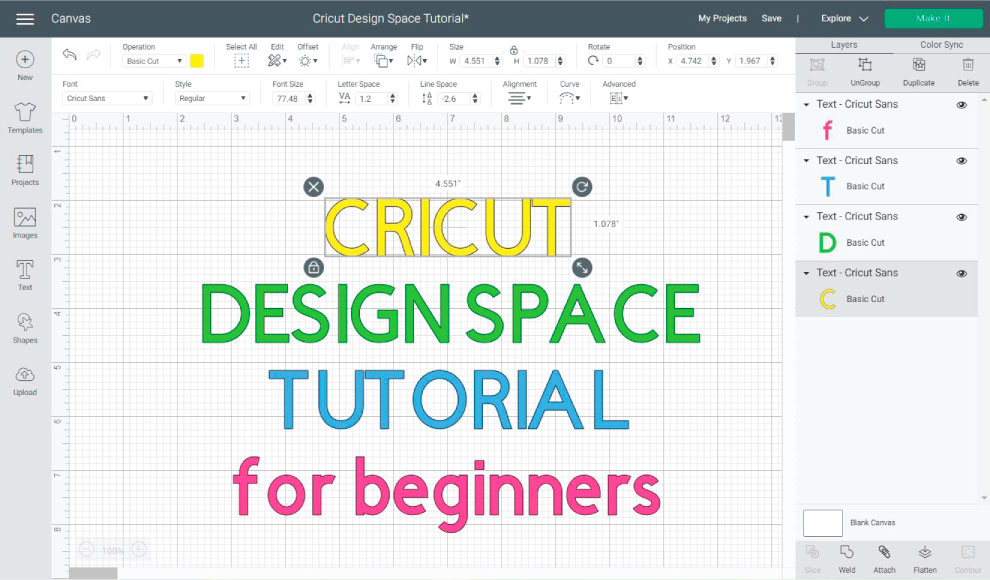
In this Post, you are about to learn what EVERY SINGLE ICON on the Canvas area is for. To keep everything in order and easy to understand, we are going to divide the canvas into four areas and four colors:
- Top Panel Yellow – Editing Area
- Left Panel Blue – Insert Area
- Right Panel Purple – Layers Panel
- Canvas Area Green
Tip: This is not a short post, so I encourage you to get a cup of coffee with some donuts or cookies if possible.

Top Panel Cricut Design Space
The top panel in the Design Space Canvas area is for editing and arranging elements on the canvas area. From this panel, you can choose what type of font you'd like to use; you can change sizes, align designs, and more!
This panel is divided into two sub-panels. The first one allows you to save, name, and finally cut your projects. And the second one will enable you to control and edit things on the canvas area.
Sub-panel #1 Name Your Project and Cut it
This sub-panel allows you to navigate from the Canvas to your profile, projects, and it also sends your completed projects to cut.


When you click on this button, another whole menu will slide open. This menu is a handy one. But it's not part of the Canvas, and that's why I won't be going into a lot of detail.
Basically, from here you can go to your profile and change your photo.
There are other useful and technical things you can do from this Menu like calibrating your machine, blades; also updating the Firmware – Software – of your device.
You can also manage your subscriptions from Cricut Access, your account details, and more.
I recommend you to click on every link so that you explore everything that Cricut Design Space has for you.
Note: On the settings option, you can change the visibility and measurements of the Canvas; this is explained better at the end of this post when I explain all about the canvas area.
Project Name
All projects start with an *Untitled "title," you can only name a project from the canvas area after you've placed at least one element (Image, shape, etc.).
My Projects
When you click on my projects, you will be redirected to your library of things you have already created; this is great because sometimes you might want to re-cut a previously created project. So, there's no need for you to recreate the same project over and over.
Save
This option will activate after you've placed one element on your canvas area. I recommend you save your project as you go. Although the software is on the cloud, if your browser crashes, there goes your hard work with it!
Machine
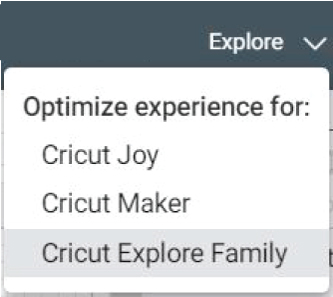
Depending on the type of machine you have you will need to select either the Cricut Joy, Maker, or the Cricut Explore Machine; this is very important because on the Cricut Maker you will find options that are only available to that particular machine.
So, if you have a Maker and you are designing with the Explore option ON, you won't see the tools that are for the Maker.
The different options are for "Operation." (I will be covering on this tutorial)
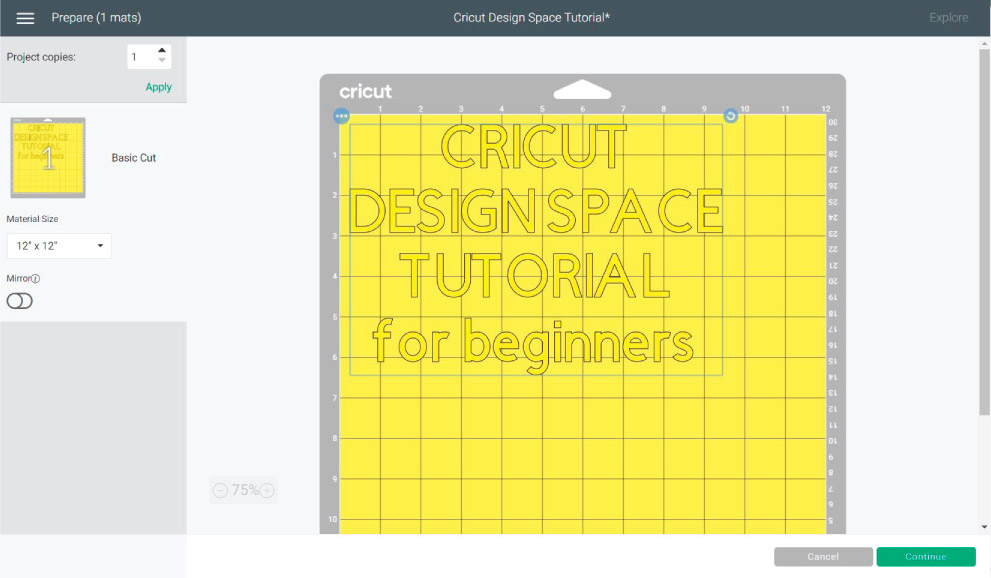
Make it
When you are done uploading your files, and ready to cut click on Make it!
Down below there's a screenshot of what you would see. Your projects are divided by mats according to the colors of your project.
From this window, you can also increase the number of projects to cut; this is great if you are planning on creating more than one cut.
It's extremely useful, and it will help you to edit, arrange, and organize fonts and images on the Canvas Area

a. Undo & Redo
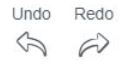
Sometimes while we work, we make mistakes. These little buttons are a great way to correct them.
Click Undo when you create something you don't like, or make a mistake. Click Redo when you accidentally delete something you didn't want to delete or modify.
(If only there were something similar for life itself lol)
b. Operation

This option will tell your machine what tools and blades you are going to use.
Remember that depending on the Machine you have selected on the top of the window (Maker, Explore, or Joy), you will have different options.
Right now, there are nine operations (basic cut, wavy, perforate, pen, foil, score, deboss, engranve, and standard print then cut)
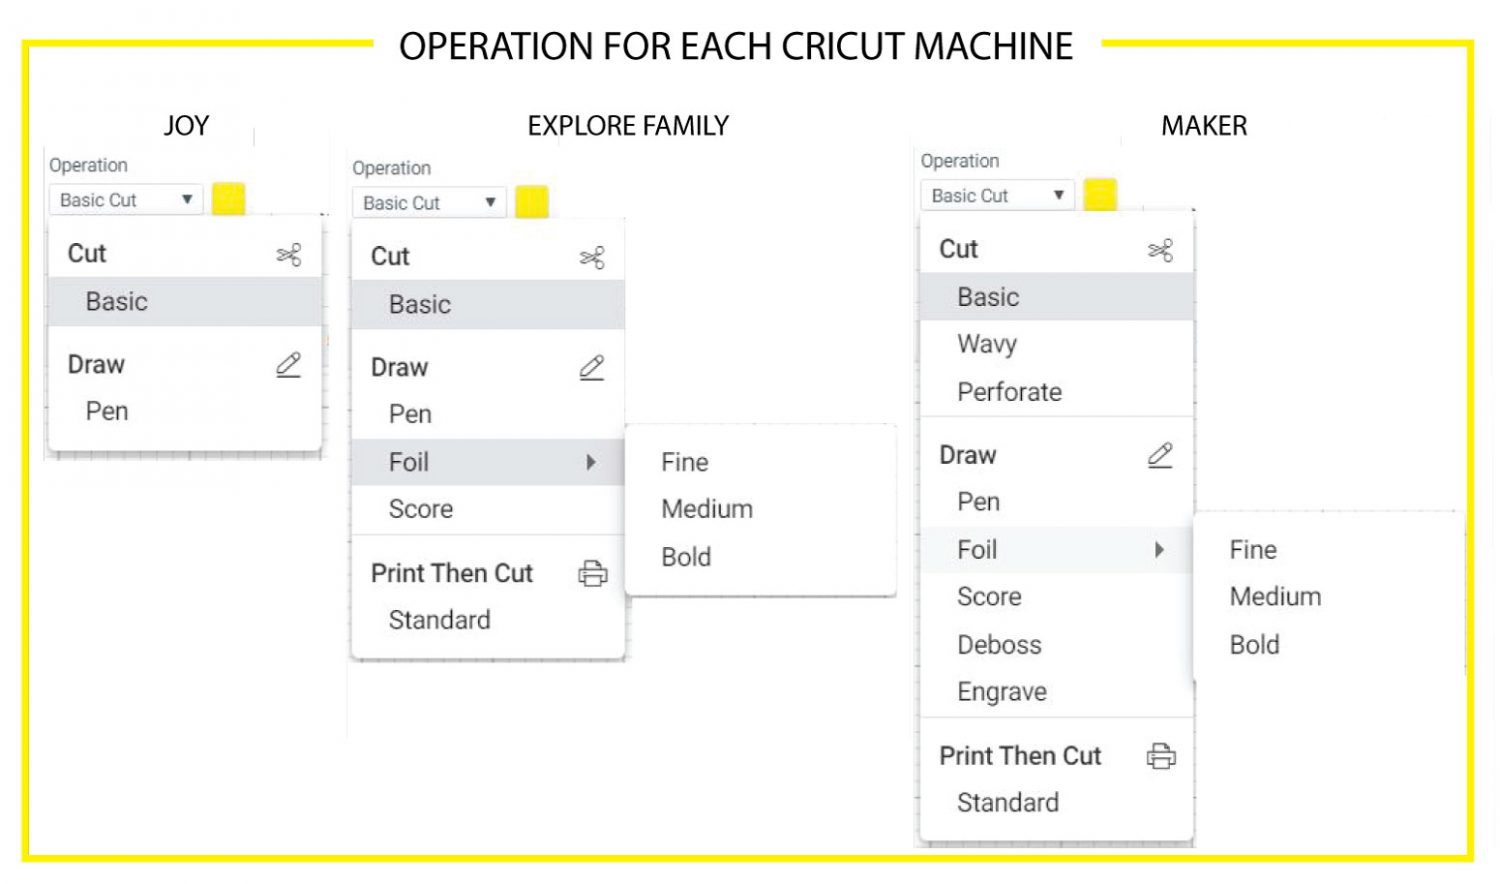
If you have a Cricut Maker, all options will be available; if you have an Explore, you will be able to Cut (Basic), Draw (Pen, Foil, and Score); last, if you have a Cricut Joy, only Cut (Basic) and Draw (Pen) will be available.
Here is a more in-depth explanation of each tool.
Basic Cut
Unless you uploaded a JPEG or PNG image to the Canvas, "Basic Cut" is the default operation that all of your elements on your canvas will have; this means that when you press MAKE IT, your machine will cut those designs.
With the "Basic Cut" option selected, you can change the color of each layer to represent the materials you will use when you cut your projects.
If you need help with learning about the Cricut Blades and the differences, I recommend you this ultimate guide and tutorial I put together. It's the best on the web, just like this tutorial 🙂
Cut – Wave
Instead of cutting on straight lines like the rotary or fine point blade, this tool will create wavy effects on your final cuts.
Getting curved lines in Design Space is quite complicated, so this tool will come in handy if you like these sorts of effects.
Cut – Perf
The Perforation Blade is a tool that allows you to cut your materials in small and uniform lines to create perfect and crisp tear effects like the ones you see in raffle tickets, coupons, tear-out cards, etc.
Learn how to use the perforation blade
Draw – Pen
If you want to write on your designs, you can do it with your Cricut!
When you assign this operation, you will be prompted to choose any of the Cricut Pens you have (You need specific pens, unless you have a 3rd party adapter). When you select a particular design, the layers on the canvas area will be outlined with the color of the pen you picked.
With this tool, when you click Make it, your Cricut will write or draw instead of cutting.
Note: This option DOESN'T color your designs.
Draw – Foil
Foil is the newest Cricut tool and it allows you to make beautiful foil finishes on your projects with the Cricut foil transfer kit.
When using this operation you have the option to choose between fine, medium, and bold finishes.
Draw – Score
Score is a more potent version of the Scoring line located on the left panel. When you assign this attribute to a layer, all of the designs will appear scored or dashed.
This time, when you click on Make it. Your Cricut won't cut, but it will score your materials.
For these types of projects, you will need the scoring stylus or the scoring wheel. However, keep in mind The wheel only works with the Cricut Maker.
If you have doubts about what materials you need, I suggest you read this article. It's the ultimate guide for you to learn, what accessories and materials you genuinely need.
Draw – Engrave
Allows you to engrave different types of materials. For instance, you can create monograms on aluminum sheets or anodized aluminum to reveal the silver beneath.
Draw – Deboss
This tip will push the material in, and it will create beautiful and detailed designs. The debossing tip will allow you to costumize your designs to a whole new level.
Just imagine debossing a beautiful gift box with flowers, hearts, stars, etc.!
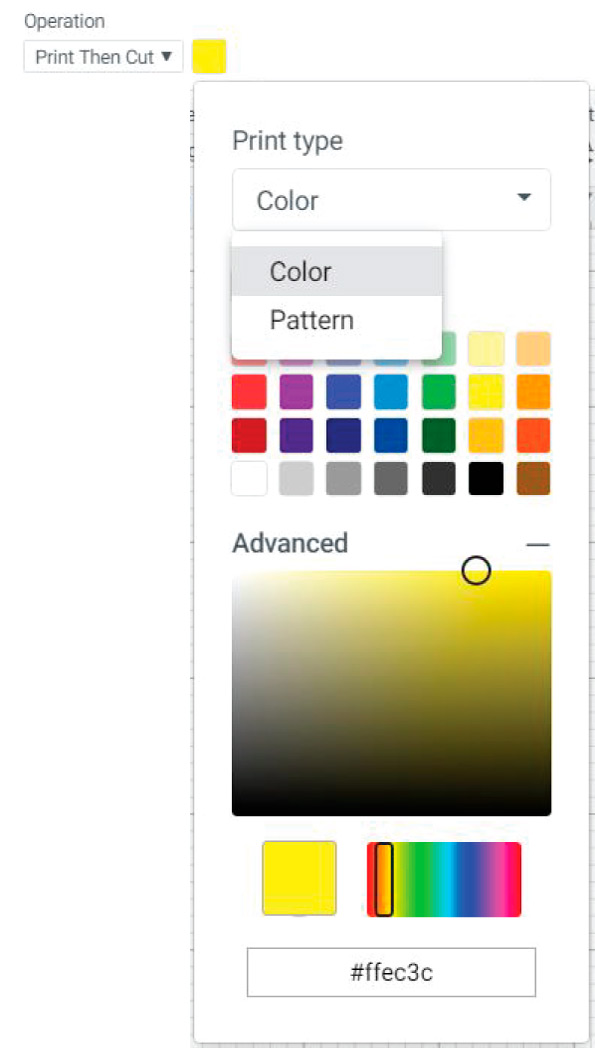
Standard (Print then Cut)
The "Standard Print then Cut" option is mainly to be used for printing and patterns.
Print is by far, one of the best features Cricut has because it allows you to print your designs and then cut them; this is fabulous, and honestly, it's what motivated me to get a Cricut in the first place.
I design tons of printables for kiddos and adults, and for taking photos – for my posts – I had to cut every single little thing!
Ahhhgggg, I seriously wanted to cry every time. I am a lefty, and scissors really make my hands hurt. So the Cricut is a live saver for me.
Anyway, we are getting back to the Printing option. When this operation is active, after you click Make it, first, you'll send your files to your home printer and then have your Cricut do all the heavy lifting. (Cutting)
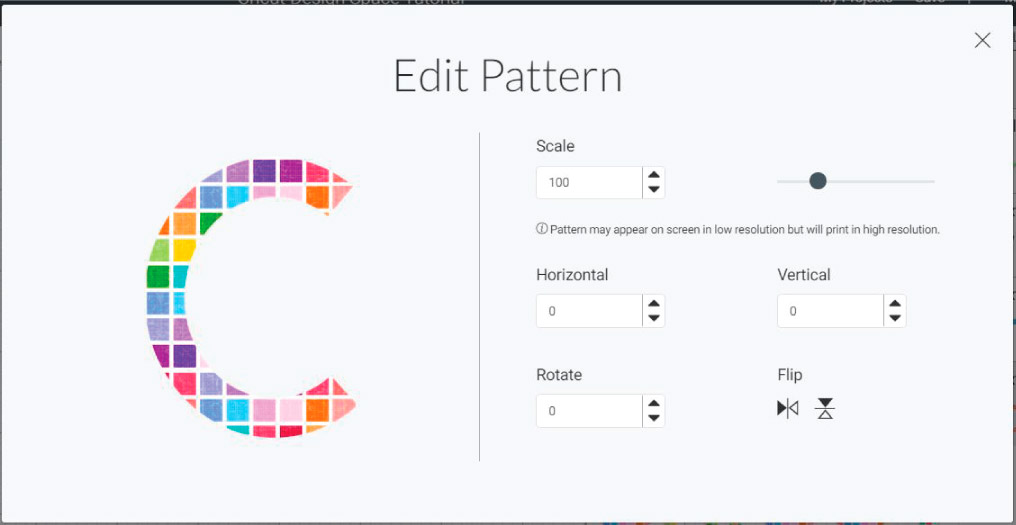
Another excellent option for the Print Type is Patterns!!!
You guys, this is so cool. Use Cricut's choices, or upload your own; you can add a pattern to pretty much any kind of layer.
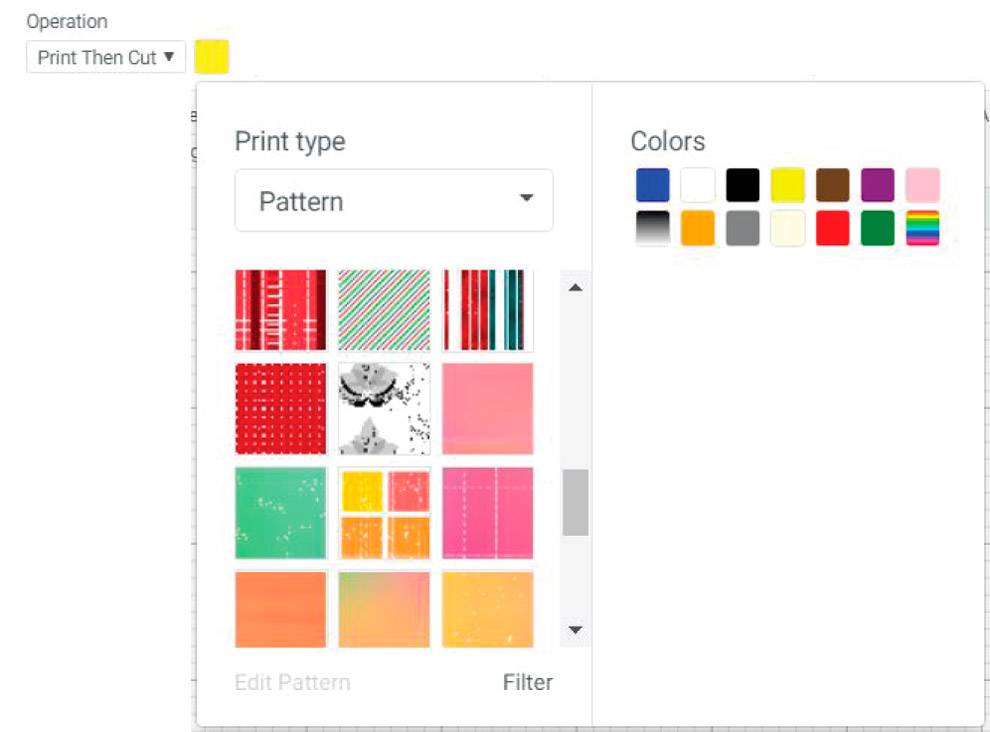
The imagination is your limit!
Let's say it's Valentine's Day. You can make a beautiful card with an already created pattern from Cricut Access (Membership, not free), or your own. Then print and cut at the same time.
Thank you, Cricut!
Print then Cut ONLY works with the Cricut Maker and any of the Explore Family Machines (it's not compatible with Cricut Joy).
c. Select All

When you need to move all of your elements inside the canvas area, you may struggle to select them one by one.
Click Select all to select all of the elements from the canvas.
d. Edit
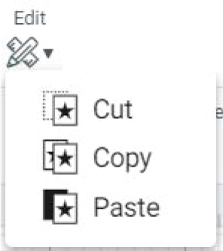
This icon will allow you to cut (remove from the canvas), copy (copy the same item, leave original intact), and paste (insert copied or cut elements on the canvas area) items from the canvas.
The Edit Icon has a drop-down menu.
The cut and copy option will be activated when you use have a selection of one or more elements from the canvas area. The Paste option will be enabled once you copy or cut something.
e. Offset

Offset, in Cricut Design Space, is a tool that allows you to create a proportional outline inside and outside of text, images, and shapes.
The offset tool is quite handy when you need to make projects like stickers, cake toppers, or any other design you may want to add a "stand-out" effect.
– Distance: It will determine how big the offset will be.
The max distance you can apply is 1 inch in both directions. If you move it to the left, you'll make an inline, and if you move it to the right, you'll outline.
– Corner: You can choose between round and square corners when making a design. I usually use the round option because it generates a better result.
– Weld Offsets: If you want your design to have a single outline check the option "Weld Offsets" and if you want the outline of every single detail of your multi-layer design, uncheck the option.

Check out my tutorial on how to master the offset tool in Cricut Design Space.
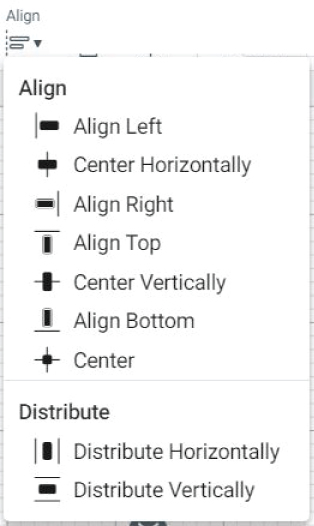
f. Align
If you have previews experience with other graphic design programs, most likely you'll know how to use this menu.
If you aren't familiar with the Align Tools, let me tell you something; the Align Menu is something that you want to master to perfection.
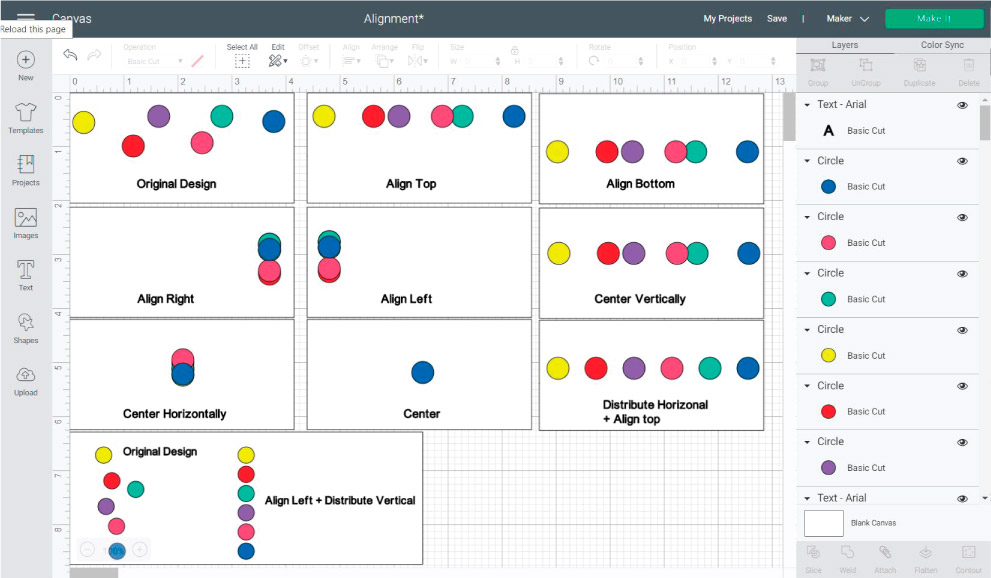
I will be creating a full tutorial for this, but while it comes out; here's what every align function means:
Align: This function allows you to align all of your designs, and it's activated when selecting two or more elements.
– Align Left: When using this setting, all of the elements will be aligned to the left. The furthest element to the left will dictate where all of the other elements will move towards.
– Center Horizontal:This option will align your elements horizontally; this will entirely center text and images.
– Align Right:When using this setting, all of your elements will be aligned to the right. The furthest element to the right will dictate where all of the other elements will move.
– Align Top:This option will align all of your selected designs to the top. The furthest element to the top will dictate where all of the other elements will move.
– Center Vertically:This option will align your elements vertically. It's handy when you are working with columns, and you want them organized and aligned.
– Align Bottom:This option will align all of your selected designs to the bottom. The furthest element to the bottom will dictate where all of the other elements will move.
– Center:This option is a very cool one. When you click on "center," you are centering, both vertically and horizontally, one design against another one; this is particularly useful when you want to center text with a shape like a square or a star.
Distribute:If you want the same spacing between elements, it's very time consuming to do it all on your own, and it's not 100% right. The distribute button will help you out with that. For it to be activated, you must have at least three elements selected.
– Distribute Horizontally:This button will distribute the elements horizontally. The furthest left and right designs will determine the length of the distribution; this means that the items that are in the center will be distributed between the most distant left and right designs.
– Distribute Vertically:This button will distribute the elements vertically. The furthest top and bottom designs will determine the length of the distribution; this means that the items that are in the center will be distributed between the most distant top and bottom designs.
g. Arrange
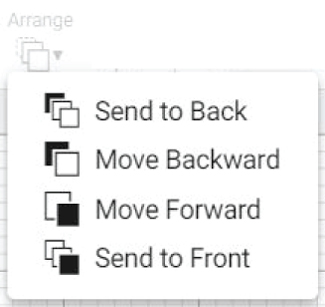
When you work with multiple images, text, and designs, the new creations you add to the canvas will always be in front of everything. However, some of the elements of your design need to be in the back or front.
With the arrange option, you can organize the elements very easily.
Something great about this function is that the program will know what item is on the front or back and, and when you select it, Design space will activate the available options for that particular element. Cool right?
These are the options you get:
– Send to back: This will move the selected element all the way to the back.
– Move Backward: This option will move selected the item just one step back. So if you have a three-element design. It will be like the cheese in a cheese sandwich.
– Move Forward: This option will move the element just one step forward. Typically, you would use this option when you have four or more items you need to organize.
– Sent to front: This option will move the selected element all the way to the front.
h. Flip
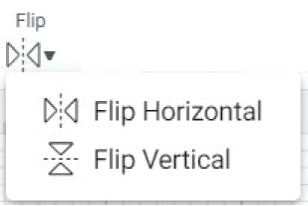
If you need to reflect any of your designs in Cricut Design Space, this is a great way to do it.
There are 2 options:
– Flip Horizontal: This will reflect your image or design horizontally. Sort of like a mirror; It's handy when you are trying to create left and right designs. Example: You are building some wings, and already have the left side; with Flip, you can copy and paste the left wing, and voila! Now you have both (left and right) wings!
– Flip Vertical: This will flip your designs vertically. Kind of like you would see your reflection on the water. If you want to create a shadow effect, this option would be great for you.
i. Size
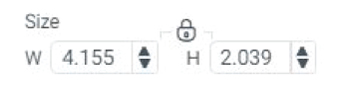
Everything you create or type in Cricut Design Space has a size. You can modify the size from the element in self (when you click on it). However, if you need an item to have an exact measurement, this option will allow you to do so.
Something essential is the little lock. When you increase or reduce the size of an image, the proportions are always locked. By clicking on the small lock, you are telling the program that you don't want to keep the same dimensions.
j. Rotate
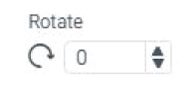
Just like size, rotating an element is something you can do very quickly from the canvas area. However, some designs need to be turned on a specific angle. If that's the case for you, I recommend you to use this function. Otherwise, you will spend so much time fighting to get an element angled the way you want it to be.
k. Position
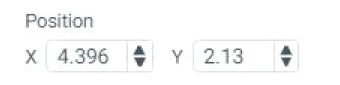
This box shows you where your items are on the canvas area when you click on a specific design.
You can move your elements around by specifying where you want that element to be located on the canvas areas. It's handy, but it's a more advanced tool.
Personally, I don't use it that much because I can get around better with the alignment tools I mentioned above.
l. Font
When you click on this icon, you can select any font you want to use for your projects. You can filter them and search for them on the top of the window.
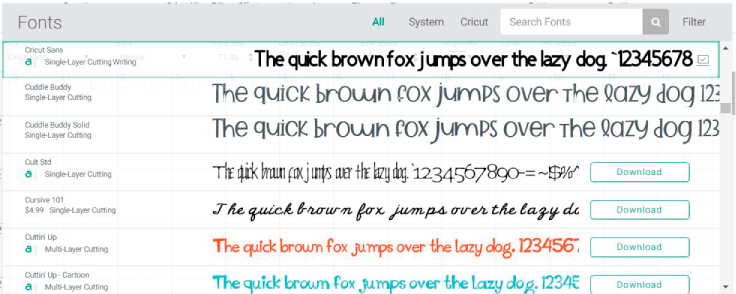
If you have Cricut Access, you can use any of all the fonts that have a little green A at the beginning of the font title.
However, if you don't have Cricut access, Make sure you use your system's fonts; otherwise you will be charged when you send your project to cut.
m. Style
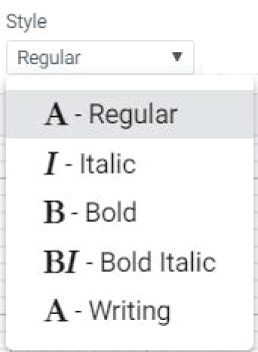
Once you pick your font, you have the option to change its form.
Some of the options you have:
– Regular: this is the default setting, and it won't change the appearance of your font.
– Bold: it will make the font thicker.
– Italic: it will tilt the font to the right.
– Bold italic: it will make the font thicker and tilt to the right.
n. Font Size, Letter & Line Space

I can't express enough how AMAZING these options are. Especially the letter spacing.
Font Size: You can change it manually from here. I usually just adjust the size of my fonts from the canvas area.
Letter Space: Some fonts have a considerable gap between each letter. This option will allow you to reduce the space between letters very quickly. It's seriously a game-changer.
Line Space: this option will tackle the space between lines in a paragraph; this is very useful because sometimes I am forced to create a single line of text because I am not happy with the spacing between lines.
o. Alignment
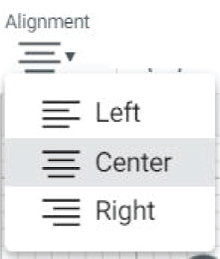
This Alignment differs from the other "alignment" I explained above. This option is for paragraphs.
These are the options you have:
– Left: Align a paragraph to the left
– Center:Align a paragraph to the center
– Right: Align a paragraph to the right.
p. Curve
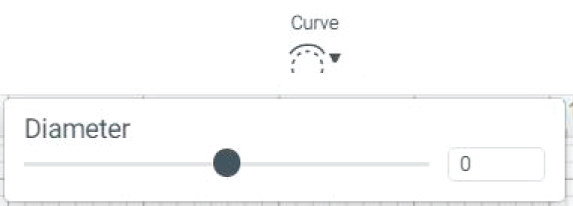
This option will allow you to get extra creative with your text!
With this function, you can curve your text — the best way to learn it's by playing with the little slider.
When you move the slider to the left, it will curve the text upwards; and when you move it to the right, it will bend the text inwards.
Note: if you move the slider entirely to the left, or right; you will form a circle with your fonts.
p. Advance
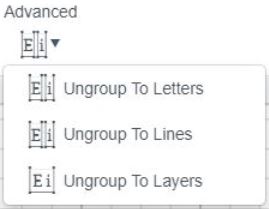
Advance is the last option on the editing panel.
Don't be intimidated by the name of this drop-down menu. Once you learn what all of the options are for, you will see they are not that hard to use.
– Ungroup to Letters:This option will allow you to separate each letter, into a single layer (I will explain more about Layers down below); use this, if you have plans to modify every single character.
– Ungroup to Lines:This option is exceptional, and it will allow you to separate a paragraph on individual lines. Type your paragraph, then click on ungroup to lines and there you have it; a separate line that you can now modify.
– Ungroup to Layers:This one is the trickiest of all of these options. This option is only available for Multi-Layer fonts; these kinds of fonts are only available for individual purchases and, or Cricut Access.
A multi-layer font is a type of font that has more than one layer; these fonts are great if you want to have some shadow or color around it.
What if you like a font that is multi-layer and you don't want the added layer? Just select your text and then click on ungroup to layers to separate every single layer.
Learn how to Edit Text in Cricut Design Space
A quick pause to invite you over on my Instagram! Tag me and let me see all of your beautiful creations. I am so happy when I see people are using my tutorials!
Left Panel – Insert Shapes, Images & More

With the top panel (that I just explained to detail) you are going to edit all of your designs.
But where do they all come from? They all come from the Cricut Design Space Left Panel.
This panel is all about inserting shapes, images, ready to cut projects, and more. From here you are going to add all of the things you are going to cut.
This panel has seven options:
– New: to create and replace a new project in the canvas area.
– Templates: this allows you to have a guide on the types of things you are going to cut. Let's say you want to iron on vinyl on a onesie. When you select the template, you can design and see how the design would look like.
– Projects: Add ready to cut projects from Cricut Access.
– Images: Pick single images from Cricut Access, and cartridges to create a project.
– Text: Click here to add text on your canvas area.
– Shapes: Insert all kinds of shapes on the canvas.
– Uploads: Upload your images and cut files to the program.
There's something fundamental that you need to consider on this panel; unless you have Cricut Access, Cricut Images, ready to cut projects, and Cricut fonts cost money. If you use them, you will have to pay before you cut your project.
If you still have doubts about Cricut Access. Do yourself a favor and read this ultimate guide I put together for you to find out whether you need it or not. It's seriously a lifesaver.
Now, that we saw a little preview of what everything was for on this panel. Let's see what happens when you click on each of those buttons.
a. New
When you click on NEW, and if you are already working on a project, you will receive a warning on top of the window asking you whether you want to replace your project or not.
If you want to replace your project, make sure to save all the changes from the current project; otherwise, you will lose all that hard work. After you save, a fresh new and empty canvas will open up for you to get started.

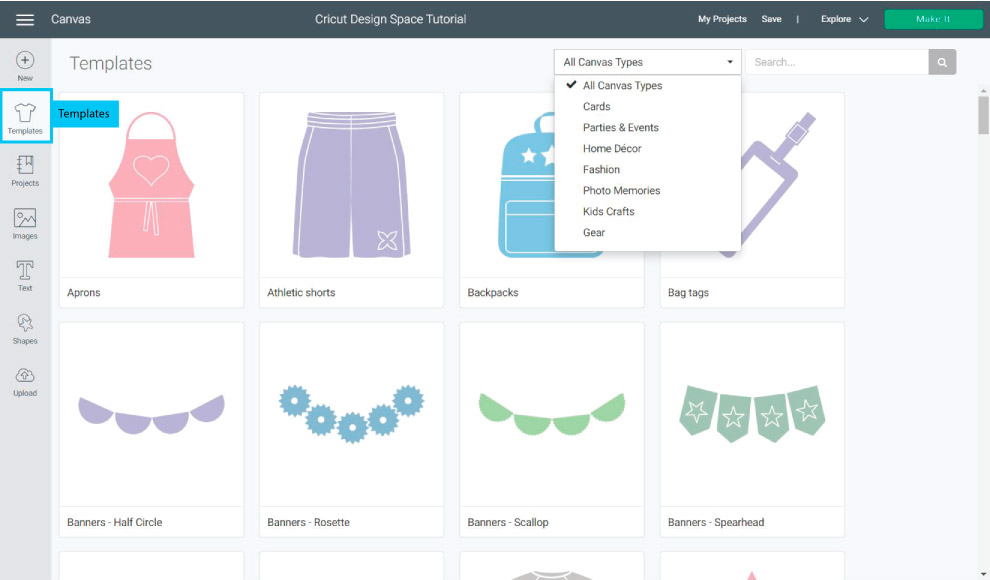
b. Templates
Templates help you to visualize and see how your project will fit on a particular surface. I think this feature is just out of this world.
If you want to personalize fashion items, this tool is marvelous because you can select sizes and different types of clothing. Plus they also have a lot of various categories that you can choose from.
If you want to learn everything more about templates and how to use them, I recommend you reading this post.
Note: templates are just for you to visualize. Nothing will be cut when you finish designing and send your project to be cut.
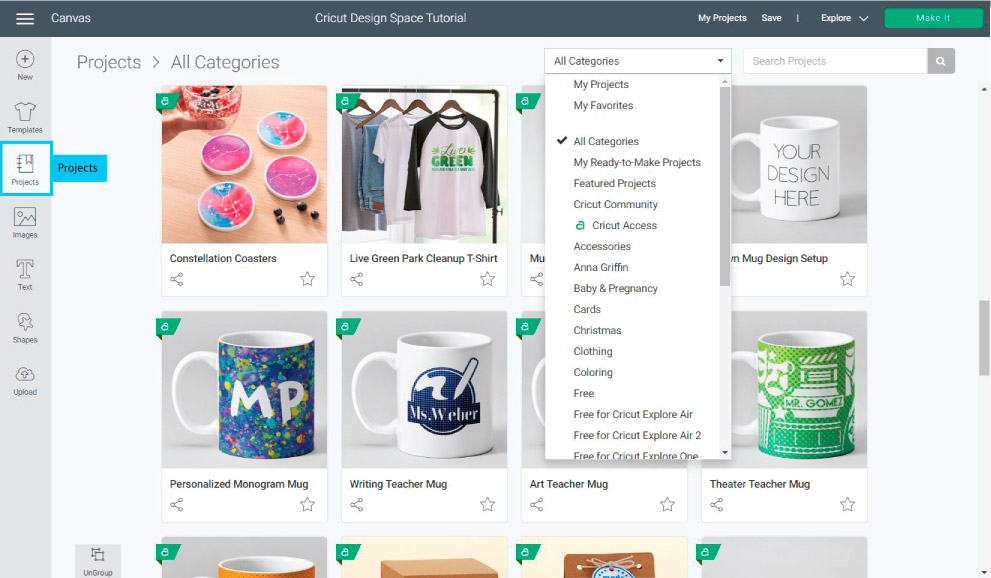
c. Projects
If you wish to cut right away, then Projects is where you want to go! Once you select your project, you can customize it; or click on make it, and follow the cutting instructions.
Tip: Most of the projects are available for Cricut Access members, or you can purchase them as you go. However, there are a handful of projects FREE for you to cut, depending on the machine you have. Just scroll to the bottom of the categories' drop-down menu and select the device you own.
No excuses!
d. Images
Images are perfect when you are putting together your own projects; with them, you can add an extra touch and personality to your crafts.
You can search by keyword, highlighted categories, themes, people, places, occasions
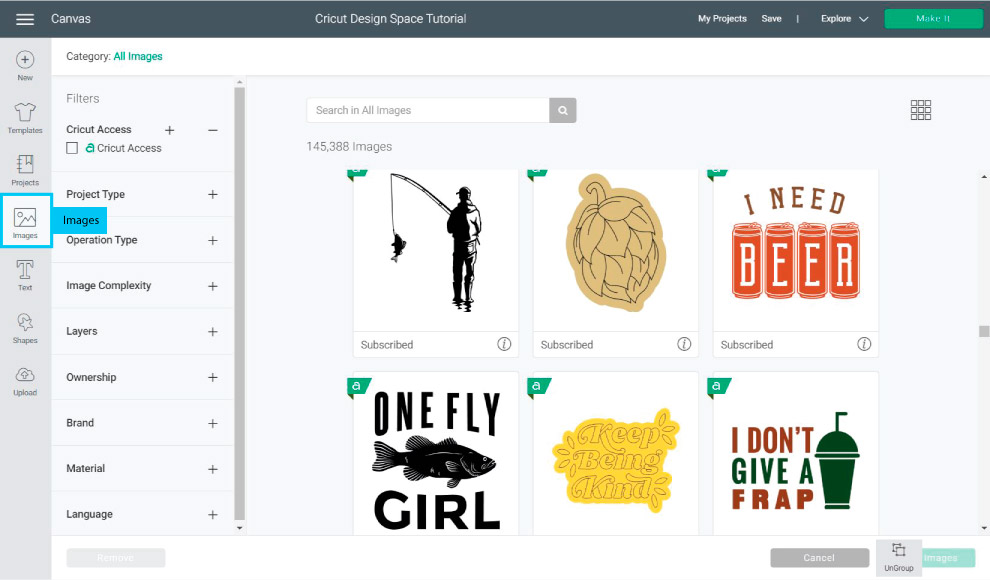
Cartridges are a set of images that you need to purchase separately; some of them come with Cricut Access, and some not. (Brands such as Disney, Sesame Street, Hello Kitty, etc. are not part of Cricut Acces)
Under "Highlighted Categories" Cricut has FREE images to cut every week.
Anytime you click under any category, a more powerful filter will appear. With this filter, you can narrow your search even further.
I suggest you play with these filters so you find images more efficiently.
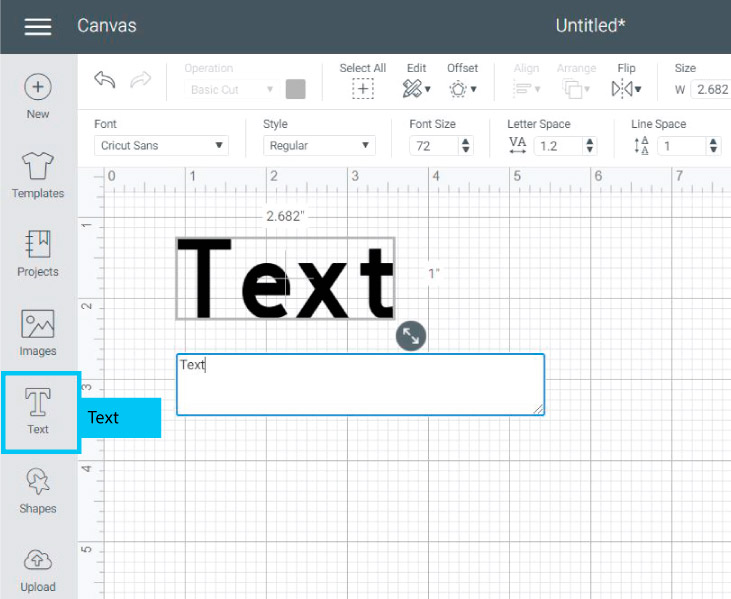
e. Text
Anytime you want to type on the Canvas Area, you will need to click on Text; then, a little window that says "Add text here" will open on the canvas.
Learn how to edit text like a pro on this great guide I put together!
f. Shapes
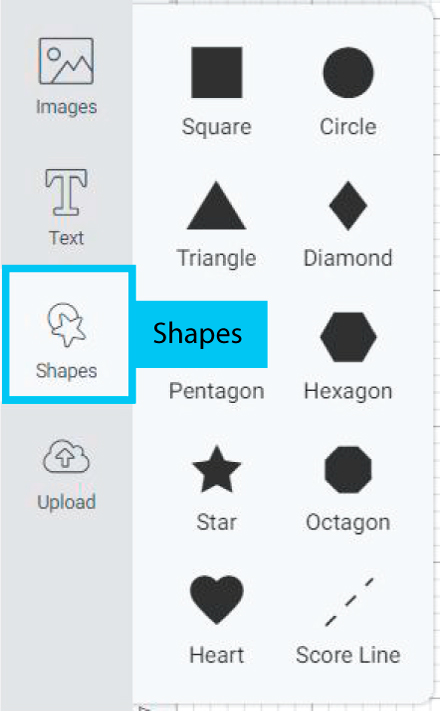
Being able to use shapes, it's essential! With them, you can create simple and less complicated, and (also) beautiful projects.
There're nine shapes you can choose from:
– Square
– Triangle
– Pentagon
– Hexagon
– Star
– Octagon
– Heart
The last option is not a shape, but an amazing and powerful tool called Score Line. With this option, you can create folds and score your materials.
If you want to create boxes or love everything about card making, the Score Line will be your best friend!
Learn how to edit shapes like a Pro!
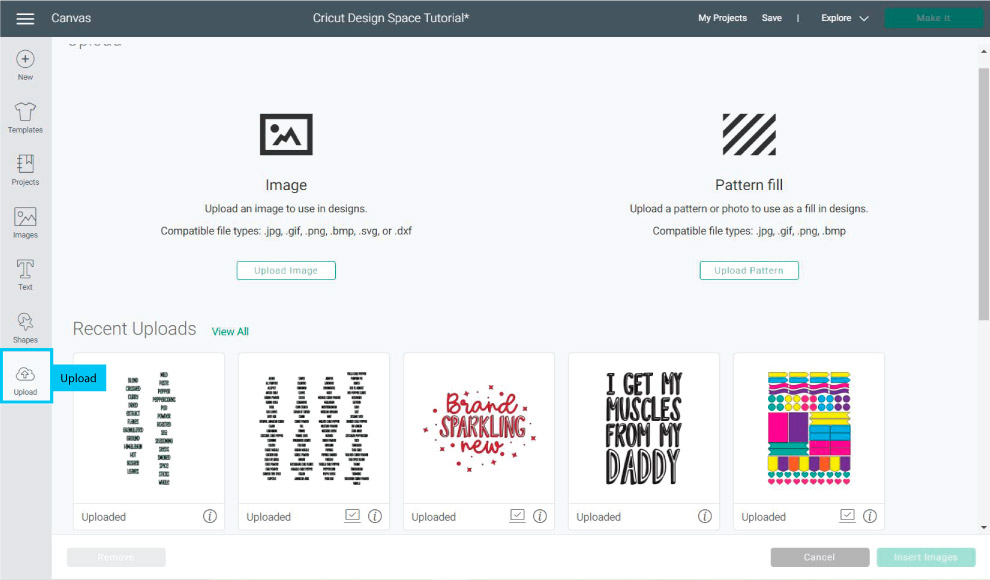
g. Upload
Last, but not least!
With this option, you can upload your files and images. The internet is filled with them; there are tons of bloggers that create projects for free.
Oh!
And just so you know, I also have a library full of free SVG files and Printables for all of my subscribers, a.k.a Daydreamers. You can see a preview right here or get access by filling this form.
Note: The uploads you see on the image right down below are inside my fantastic library!
Right Panel – Learn All about Layers
To set you up for success and before I explain to you what every icon is all about on the Layers Panel, let me give you a little introduction of what a layer is.
Layers represent every single element or design that is on the canvas area.
Think of it like clothing; when you get dressed, you have multiple layers that make up your outfit; and depending on the day, or time of year, your outfit can be simple or complex.
So, for a freezing day, your layers would be underwear, pants, shirt, jacket, sock, boots, gloves, etc.; and for a day at the pool, you would only have one layer, a Swim Suit!
The same happens with a design; depending on the complexity of the project you are working on, you'll have different types of layers that'll make up your entire project.
For example, let's pretend that you are designing a Christmas Card.
What would this card have?
Maybe a text that says Merry Christmas, a tree, the card itself, perhaps an envelope as well?
My point is that all of the little designs and elements that are part of that project are layers.
Some layers can be modified; However, other layers, like JPEG and PNG images, can't; this is because of the nature of the file or the layer itself.
For instance, a text layer can be converted into other types of layers; but, when you do that, you'll lose the ability to edit that text.
As you go, you will learn more about what can or can't do with layers.
I hope that gave you a good idea of what a layer is! Now let's learn what every single icon is for on this right panel.
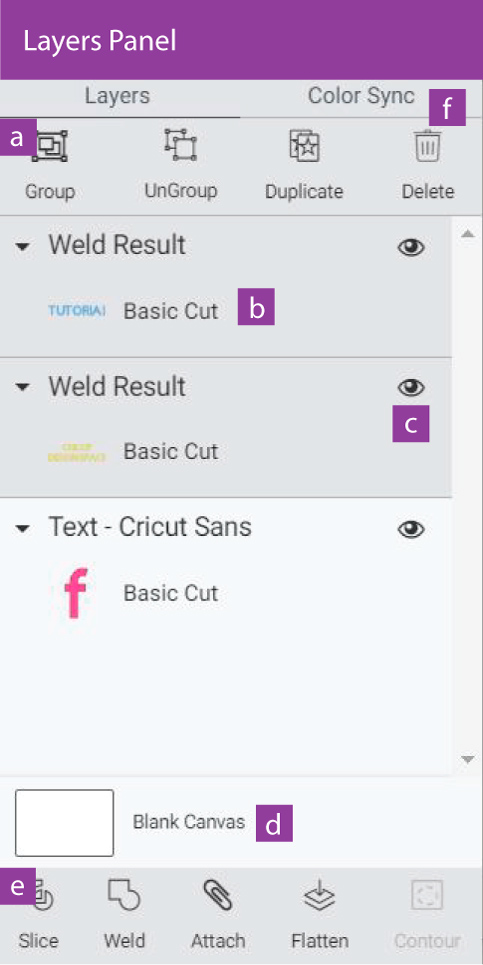
a. Group, Ungroup, Duplicate and Delete

These settings will make your life easy when moving things around the canvas area, so make sure to play around with them.
Group: Click here to group layers. This setting is handy when you have different layers that make up a complex design.
Let's say you are working on an elephant. Most likely (and if this is an SVG or cut file) the elephant will be composed of different layers (the body, eyes, legs, trunk, etc.); If you want to incorporate, extra shapes, and text; most likely is that you will be moving your elephant across the canvas area a lot.
Therefore, by grouping all of the elephant layers, you can make sure that everything will stay organize and nothing will get out of place when you move them around then canvas.
Ungroup: This option will ungroup any grouped layers you select on the canvas area or layers panel. Use this option if you need to edit (size, type of font, etc.) a particular element or layer from the group.
Duplicate: This option will duplicate any layers or designs you have selected on the layers panel or canvas.
Delete: This option will delete any elements you have selected on the canvas or layers panel.
b. Operation
Every item on the Layers Panel will show what operation you are using (basic cut, wavy, perforate, pen, foil, score, deboss, engrave, and standard print then cut)
Tip: By clicking on a layer and dragging it, you can move a particular design on top or under; you could say that this works like the Arrange option (sent to the front, back, etc.).
c. Layer Visibility

The little eye that appears on every layer on the layers panel represents the visibility of a design. When you are not sure whether an element looks good, instead of deleting it, click on the little eye to hide that design. Note: When you hide an item, the eye will have a cross mark.
d. Blank Canvas
This "layer" allows you to change the color of your canvas; if you are trying to see how a particular design looks with a different color.
This setting's power is unleashed when you use it along with the Templates tool because you can modify the color and the options of the template itself.
e. Slice, Weld, Attach, Flatten and Contour
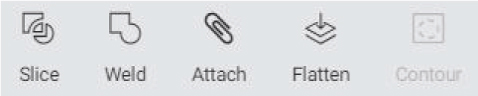
These tools you see here are incredibly important! So make sure you master them to perfection.
I won't go into a lot of detail on them because they deserve tutorials on their own.
However, I will give you a brief explanation of what they are all about by using the graphic down below.
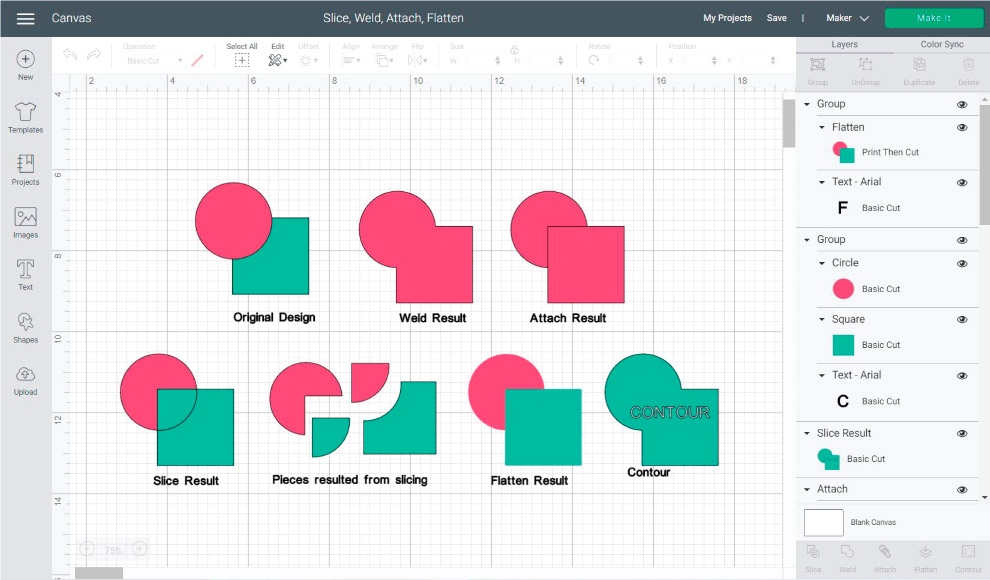
Slice, Weld, Attach, Flatten, and Contour Info-Graphic
As you can see in the graphic, the original design is a pink circle and a teal square. Now let's see what happens when I use all of these options.
Slice
The slice tool is perfect for cutting out shapes, text, and other elements, from different designs.
When I selected both shapes and clicked on slice, you can see that the original file got all cut up; to show you what the final outcome was, I copied and pasted the "slice result" and then separated all of the pieces that resulted from slicing.
Learn more about the slice tool
Weld
The welding tool allows you to combine two or more shapes in one.
When I selected both shapes and clicked on Weld, you can see that I created a whole new shape. The color is determined by the layer that is on the back, that's why the new shape is pink in color.
Attach
Attach works like grouping layers, but it's more powerful.
When I selected both shapes and clicked on attach, you can see that the layers just changed color (determined by the layer that is on the back). However, the shapes are connected, and this attachment will remain in place, even after I send my project to be cut.
Learn more about Weld and Attach
Flatten
This tool is extra support for the Standard Print then Cut setting.
You see, when you have "Print then Cut" activated, that change applies to just one layer at the time. But what if you wish to do it to multiple shapes at the time?
When you are done with your design, select the layers you want to print together as a whole, and then click on flatten.
When you are done with your designed (you can't reverse this after exiting your project), select the layers you want to print together as a whole, and then click on flatten.
In this case, the element became a print then cut design, and that's why it isn't showing a black edge (where the blade will go through) anymore.
Learn more about Flatten and Print then Cut
Contour
The Contour tool allows you to hide unwanted pieces of a design, and it will only be activated when a shape or design has elements that can be left out.
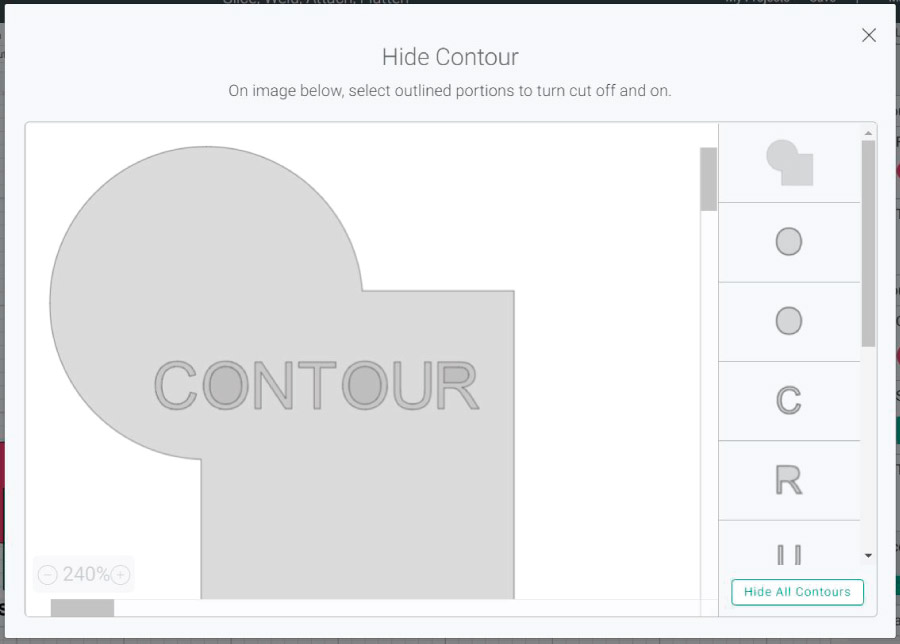
For this example, I combined the original design in one shape with the weld tool; then I typed in the word contour and sliced it against the new shape, and used the Contour tool to hide the inner circles of the two letters O and the inner part of the letter R.
Learn more about the contour tool
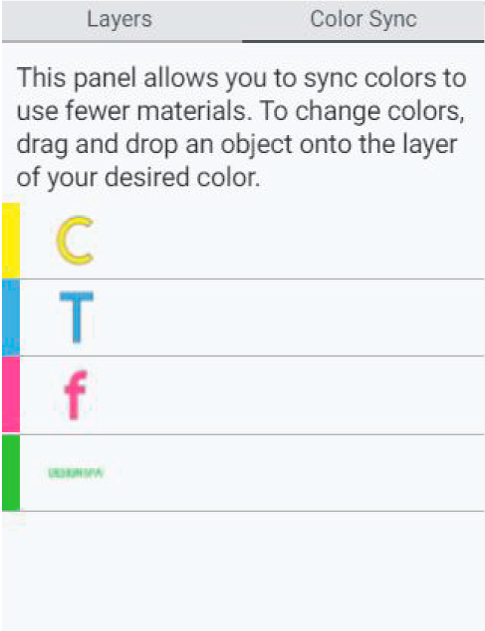
f. Color Sync
Color Sync is the last option of the layers panel.
Every color on your canvas area represents a different material color. If your design has multiple shades of yellows or blues, are you sure you need them?
If you only need one shade of yellow, like this example. Just click and drag the tone you want to get rid of and drop it on the one you want to keep.
Learn how colors work in Cricut Design Space
Canvas Area
The canvas area is where you see all of your designs and elements. It's very intuitive and effortless to use!
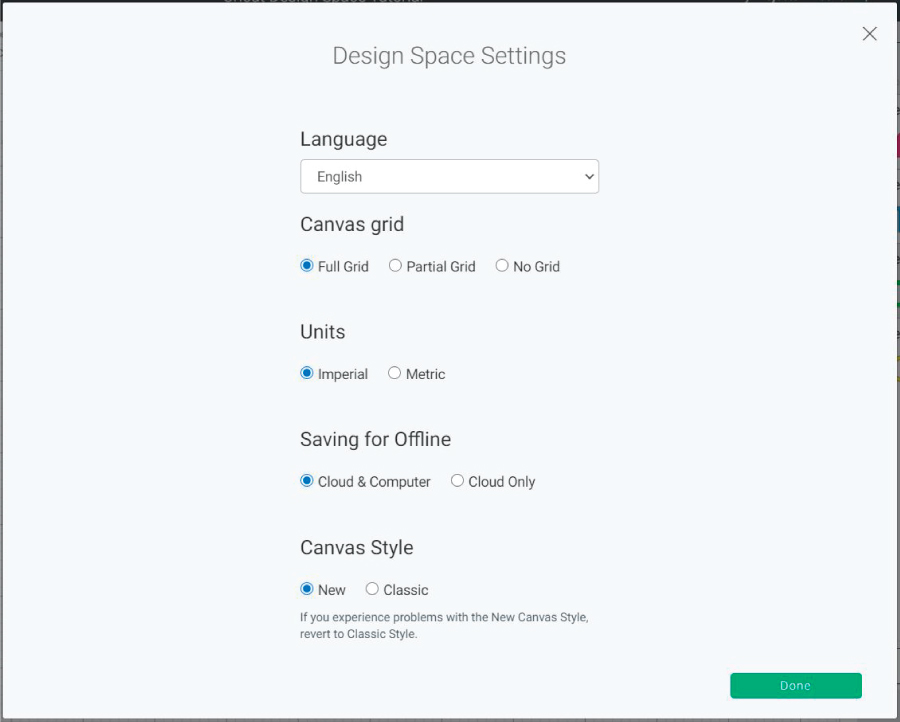
a. Canvas Grid and Measurements
The canvas area is divided by a grid; this is great because every little square you see on the Grid helps you to visualize the cutting mat. In the end, this will help you to maximize your space.
You can change the measurements from inches to cm and turn the grid on and off when you click on the top panel toggle and then select Settings. (You can see this toggle menu, right in the beginning of this tutorial)
A window will pop up with all of the options.
b. Selection
Anytime you select one or more layers, the selection is blue, and you can modify it from all of the four corners.
The "red x" is for deleting the layers. The right upper corner will allow you to rotate the image (although if you need a specific angle, I recommend you to use the rotate tool on the editing menu).
The lower right button of the selection, "the small lock," keeps the size proportional when you increase or decrease the size of your layer. By clicking on it, you are now able to have different proportions.
c. Zoom In and Out
Last but not least. If you want to see in a bigger or smaller scale (without modifying the real size of your designs), you can do it by pressing the "+ and -" signs on the lower-left corner of the canvas.
That's it – You are not a beginner anymore!
I hope this tutorial was useful for you! If you read it and studied it consciously, let me tell you something that you are not a beginner.
You have graduated!
Do you know that it takes me over 25 hours of work to complete a single Cricut article? I know, it's crazy! But I like to make sure that you understand EVERYTHING!
I would appreciate your support on Instagram / Pinterest / YouTube / as I am trying to grow my audience to keep producing great content!
If I am missing something, please let me know in the comments below so I can add the information to this tutorial, and have it to be the most complete on the Internet.
Cricut Design Space 3d Paper Flowers
Source: https://www.daydreamintoreality.com/cricut-design-space-canvas-tutorial/
Posted by: meehipen1969.blogspot.com
0 Response to "Cricut Design Space 3d Paper Flowers"
Post a Comment